
Getting Started with Time Tagger in NI LabVIEW
Learn how to program Time Tagger from NI LabVIEW using .NET nodes, including where to find examples and a walkthrough screencast.
The Time Tagger software engine is written in highly optimized C++ code. Other programming languages are supported through language wrappers (Python, MATLAB, C#/dotNET) and have the same features and function signatures. This makes programming of the Time Tagger in any supported language very similar and allows the use of the same documentation that is provided here .
Within LabVIEW, you can program the Time Tagger by interfacing with our dotNET assembly. All the functions are exactly as described in the programming interface documentation. To get started, please take a look at the LabVIEW examples provided in the Time Tagger installation directory.
C:\Program Files\Swabian Instruments\Time Tagger\examples\LabView
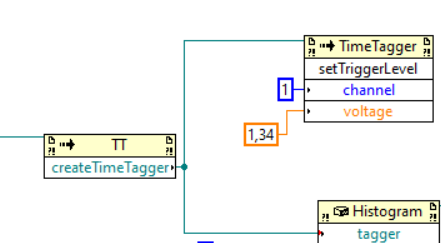
We do not ship the Time Tagger library as native LabVIEW VIs, instead all functions and their parameters are represented within LabVIEW as .NET nodes. They appear slightly different but work similarly, and you connect their input and output terminals with wires. To start coding, you need to create a dotNET class constructor and choose the assembly “SwabianInstruments.TimeTagger” which is registered system-wide.
More on how to use dotNET in LabVIEW may be found here: Link
You can set Time Tagger parameters like trigger level or input delay by accessing corresponding methods on the Time Tagger object.
This short screencast shows how to start programming Time Tagger in LabVIEW.